User's Guide: CMM ValidatorRelease 1.1Contents:
1) Overview1.1) FunctionalityThe Validator is intended to be used during the pre-processing of a Common Media Manifest (CMM) file. When validating a manifest with this tool, the user may select what level of validation checks will be applied. The levels are, in increasing level of rigor:
1.2) User Interface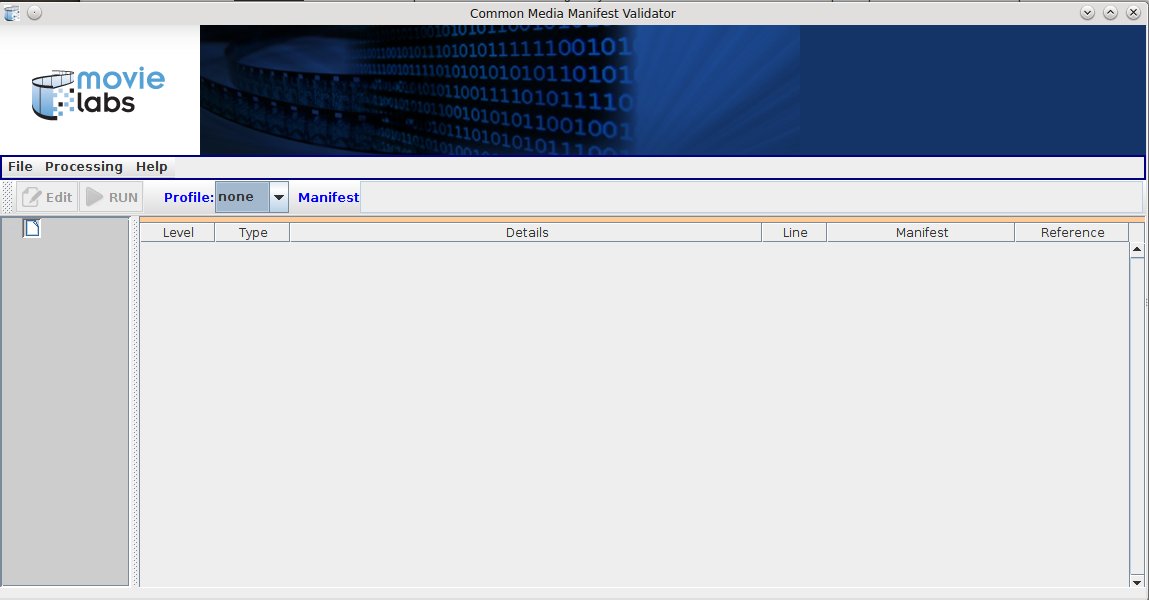
Figure 1: Validator UI
2) Using the Validator2.1) Selecting Processing Options
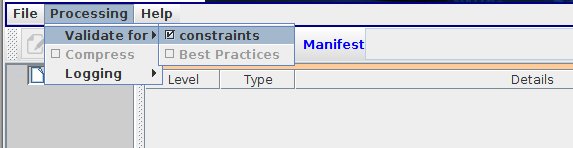
Figure 2: Validation Criteria Menu 2.2) Running the Validator and Interpreting OutputOnce all validation options have been set, the validation process may be executed via the RUN button. When the validation process completes, the results will be displayed in the Logging panel (see Figure 3). 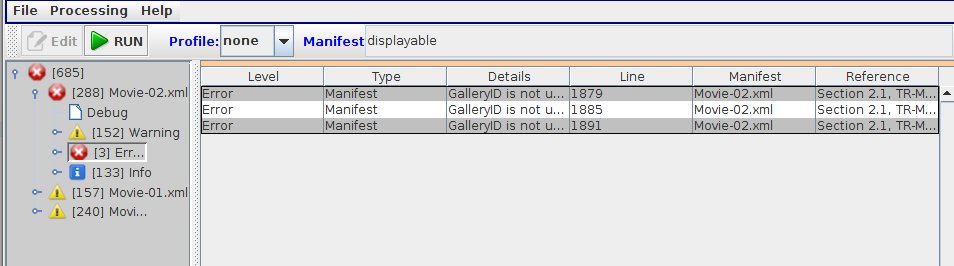
Figure 3: Validation Results 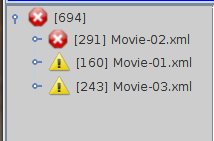
Figure 3b: Severity of Log Messages The message display pane on the right provides a table showing all the messages in which ever branch of the message hierarchy has been selected in the navigation pane. Some log messages will provide additional information via tool tips. Where possible, this will include references to specific sections of the documentation that cover the identified problem. The displayed log messages may be sorted by means of a left-click on any of the column headers (to sort by line number click on the 'Line' column header). Subsequent left-clicks will reverse the sort order. By right-clicking on the message display pane, a pop-up menu may be accessed (see Figure 4). Available actions are:
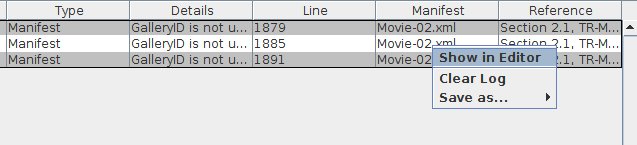
Figure 4: Message Log Pop-up Menu The saving and/or clearing of the log file are simple operations and the user interface for both of these is self-explanatory. Usage of the Editor is covered in detail in the next section. 2.3) Editing a Manifest2.3.1) OverviewThe CMM Validator includes a built-in XML Editor that may be used to correct any errors found during the validation process. Note that this is not intended to provide a full-featured XML authoring capability similar to those provided by tools such as XML Spy or Oxygen-XML. Rather it is focused on providing an easy-to-use and integrated capability for quickly correcting errors and then re-running the validation tests. The Editor UI is implemented as a separate window (see Figure 5). Multiple Editor windows may be opened at the same time, with each displaying a different Manifest file. Note, however, that there may only be one Editor window for any given file. 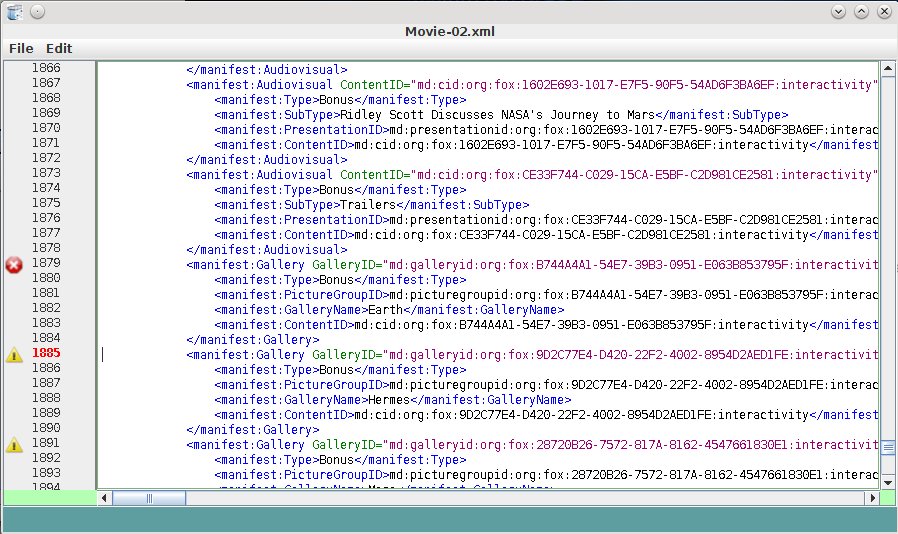
Figure 5: Manifest Editor 2.3.2) Launching the EditorAs described in Section 2..2, an Editor may be launched by the context menu displayed when the user right-clicks on a log entry. Selecting the Show in Editor item will cause an Editor for the associated file to be displayed. The location (i.e., line) in the file associated with the log entry will become the current line and will therefore be indicated by the line number being highlighted in red. For example, in Figure 5, the Editor window shown was accessed by clicking on a log entry linked to line 208 in manifest file CMM_BBB_v0.1.xml .
An Editor may also be launched using the button in the tool bar:
When an editor is launched for a specific Manifest:
2.3.3) User InterfaceThe Editor window has the following components:
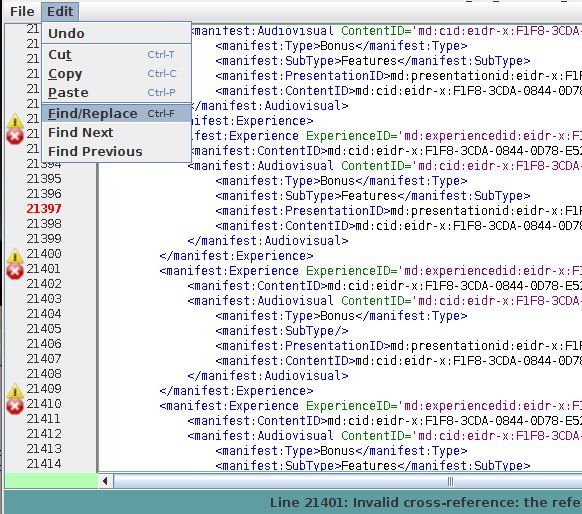
Figure 6: Editor UI The status messages are linked to the marker icons displayed along side the line numbers. A single left or right click on a marker will result in the associate log entry being displayed in the status panel. 2.3.4) Saving Changes and Re-ValidatingTo save changes, simply use either the pull down menu or the <Ctrl>S shortcut. Once the Manifest file has been saved the file may be re-validated. The changed manifest may also be saved under a new name using the Save As menu option. If the Manifest is saved under a new name then the user must explicitly identify the new manifest as the Validator's Source before it can be validated. Also it is important to remember that the existing Editor window will still be displaying the original Manifest file. In order to edit the newly saved file, the user must:
3) Running Scripts3.1) FunctionalityValidation of multiple Manifests may be performed using scripts that can specify any of same options and settings available thru the user interface. A script may easily be used to process a set of manifests with specified sub-sets being handled using different options. All results are automatically displayed in the GUI's log display but the script engine supports the option of also writing the log to a file. 3.2) Writing Command ScriptsA script file is written using the JSON syntax. The structure for a validation script is as follows:
The following is an example of script that validates two Manifest files plus any Manifests found in a specific folder and then saves the message log in an output file:
	{
  "validate":{
    "pathPrefix":"./MediaManifests/",
    "checks":{
      "contraints":"Y",
      "bestPrac":"N"
    },
    "logging":{
      "level":"Warning",
      "output":"./scriptLog01.xml"
    },
    "manifests":[
      {
        "file":"si_tests/CMM_BBB_v0.1.xml",
        "schema":"1.5",
        "profile":"DemVal"
      },
      {
        "file":"si_tests/CMM_Sita_v0.1.xml",
        "schema":"1.4",
        "profile":"none"
      },
      {
        "file":"studio",
        "schema":"1.4",
        "profile":"IP-1"
      }
    ]
  }
}
3.3) User InterfaceSelection and execution of a script is via the Run Script.. menu entry. Once a script file has been selected the execution is automatic. It is recommended that the contents of the log display be cleared prior to executing a script. Failure to do so will result in any previous messages being included in the saved log file. 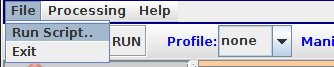
Figure 7: Script Selection and Execution |
 .
.